
Butterball XL Deep Fryer Manual: A Comprehensive Guide
Dive into effortless frying! This manual unlocks your Butterball XL fryer’s potential, detailing features and functions for delicious, safely prepared meals, starting today.
Welcome to the world of perfectly fried foods! The Butterball XL Deep Fryer is designed to bring professional-quality frying to your home kitchen. This appliance offers a generous capacity, making it ideal for families and gatherings. Whether you’re craving crispy fried chicken, golden french fries, or a succulent, deeply flavorful turkey, this fryer delivers consistent results.
This manual serves as your comprehensive guide, walking you through every step – from initial setup and safety precautions to detailed frying procedures and maintenance. We’ll ensure you maximize your fryer’s capabilities while prioritizing safety and achieving consistently delicious outcomes. Get ready to elevate your cooking!
Safety Precautions & Warnings
Prioritize safety during operation! Hot oil presents significant hazards. Always operate the fryer on a stable, level surface away from flammable materials. Never leave the fryer unattended while in use. Ensure the unit is completely cooled before disassembly or cleaning;
Keep children and pets away from the hot fryer. Avoid contact with hot surfaces, utilizing handles and wearing appropriate heat-resistant gloves. Never overfill the cooking pot with oil or food. Do not immerse the fryer base, power cord, or plug in water. Disconnect the fryer when not in use. Failure to follow these warnings could result in serious injury.
Understanding the Components
Familiarize yourself with your fryer! The Butterball XL features a robust Fryer Base & Housing, providing a stable foundation for safe operation. The spacious Cooking Pot & Basket accommodates large food quantities. Precise temperature control is achieved via the Temperature Control & Timer, ensuring perfectly cooked results.
A heavy-duty Power Cord & Plug delivers reliable power. Understanding each component’s function is crucial for optimal performance and longevity. Refer to the diagrams within this manual for visual identification of each part. Proper component knowledge enhances your frying experience and ensures safe usage.
Fryer Base & Housing
The foundation of your frying setup! The Butterball XL’s Fryer Base is constructed from durable, heat-resistant materials, ensuring stability during operation. The surrounding Housing protects internal components and minimizes heat transfer to external surfaces. This robust design prioritizes safety and longevity.
Inspect the base regularly for any signs of damage. Ensure it sits on a level, non-combustible surface. The housing features convenient handles for easy transport when the unit is cool. Maintaining a clean base and housing contributes to the overall performance and lifespan of your fryer.
Cooking Pot & Basket
Essential for perfect results! The Cooking Pot, typically made of stainless steel, holds the oil and food during the frying process. Its generous capacity accommodates large batches. The accompanying Basket, often with a cool-touch handle, allows for safe and easy food loading and removal.
Before each use, ensure the pot is clean and free of debris. The basket’s design promotes even cooking and drainage. Avoid overcrowding the basket to maintain oil circulation and consistent crispness. Regularly inspect both components for wear and tear, replacing them as needed for optimal performance.
Temperature Control & Timer
Precision is key to frying success! The Temperature Control allows you to set and maintain the ideal oil temperature for various foods, ensuring they’re cooked thoroughly and achieve desired crispness. A clear, easy-to-read dial or digital display is standard.
The integrated Timer lets you accurately time the frying process, preventing undercooking or burning. Many models feature an automatic shut-off function when the timer expires, enhancing safety. Regularly calibrate the temperature and timer for accuracy. Understanding these controls is vital for consistently delicious results.
Power Cord & Plug
Electrical safety is paramount! The Power Cord and Plug are designed to handle the fryer’s high wattage. Always ensure the cord is undamaged – never use a fryer with a frayed or exposed wire. Plug the fryer directly into a grounded outlet; avoid extension cords if possible.
If an extension cord is necessary, it must be heavy-duty and rated for the fryer’s power requirements. Never operate the fryer with a damaged plug or outlet. Inspect the cord before each use, and avoid any contact with hot surfaces during operation. Proper handling prevents electrical hazards.
Setting Up Your Butterball XL Fryer
Preparation is key for successful frying! Begin by carefully inspecting all components for shipping damage. Thoroughly clean the cooking pot, basket, and housing with warm, soapy water before first use. Ensure all parts are completely dry before assembling the fryer – proper alignment is crucial.
Next, choose a safe location – a flat, stable, and well-ventilated outdoor area, away from flammable materials. Never operate the fryer indoors or on wooden surfaces. Confirm the electrical outlet is grounded and accessible. Following these steps guarantees a safe and enjoyable frying experience.
Initial Inspection & Cleaning
Prior to your first use, a thorough inspection is vital. Carefully unpack your Butterball XL fryer and examine all components for any signs of damage incurred during shipping. Check the cooking pot for dents, the basket for bends, and the housing for cracks.
Cleaning is equally important. Wash the cooking pot, frying basket, and exterior housing with warm, soapy water. Rinse completely and allow all parts to air dry before reassembling. This removes any manufacturing residue and ensures a clean, safe frying environment. Do not use abrasive cleaners!
Assembling the Fryer
Proper assembly ensures safe and efficient operation. Begin by placing the fryer base on a stable, level surface. Carefully insert the cooking pot into the fryer housing, ensuring it sits securely. Attach the frying basket handle to the basket itself, verifying a firm connection.
Confirm the temperature probe and timer are correctly positioned. Double-check all connections before adding oil. A loose component can lead to malfunctions or safety hazards. Refer to the diagram in this manual for visual guidance. Ensure everything clicks into place securely.
Choosing a Safe Location for Frying
Safety is paramount when deep frying. Always set up your Butterball XL fryer outdoors, far away from buildings, decks, and flammable materials. A level, non-combustible surface is crucial – avoid grass, wooden surfaces, or uneven ground.
Keep children and pets at a safe distance. Ensure ample space around the fryer to prevent accidental contact with hot oil. Never operate the fryer in enclosed spaces like garages or sheds. Be mindful of wind conditions, as they can affect oil temperature and splatter.
Oil Selection & Preparation
Choosing the right oil is key to flavorful frying. Recommended options for your Butterball XL fryer include peanut, canola, and vegetable oils, each offering a distinct smoke point and flavor profile. Always ensure the oil is fresh and free of contaminants.
Calculating the correct oil volume prevents overflow and ensures even cooking. Refer to the fryer’s markings or consult the included guide for specific food types. Filtering used oil extends its lifespan and maintains quality; store it properly in a sealed container.
Recommended Oil Types (Peanut, Canola, Vegetable)
Peanut oil boasts a high smoke point and imparts a subtle, nutty flavor – ideal for turkey and fried chicken. Canola oil is a versatile, neutral-flavored option suitable for various foods, offering a cost-effective choice. Vegetable oil, often a blend, provides a balanced profile and is widely available.
Consider your food’s flavor and desired outcome when selecting. Always check for allergies before using peanut oil. Ensure the oil’s smoke point exceeds your frying temperature for safe and optimal results with your Butterball XL fryer.
Calculating Oil Volume for Different Foods
Accurate oil volume is crucial for safe and efficient frying with your Butterball XL. Partially fill the pot with the food item, then add water until it covers the food by at least one inch. Remove the food and carefully measure the remaining water – this equates to the required oil volume.
Larger items, like a whole turkey, necessitate significantly more oil. Never exceed the “max fill” line indicated inside the cooking pot. Overfilling poses a serious safety hazard. Always prioritize safety and precise measurement for optimal frying results.
Filtering and Storing Used Oil
Proper oil management extends its lifespan and maintains flavor quality. After each use, allow the oil to cool completely. Carefully filter it through a fine-mesh sieve lined with cheesecloth or a dedicated oil filter to remove food particles.
Store filtered oil in a tightly sealed, dark container in a cool, dry place. Avoid exposure to light and heat, which accelerate degradation. Properly stored oil can typically be reused 2-3 times, but discard it if it becomes dark, cloudy, or develops an unpleasant odor.
Frying Procedures: Step-by-Step
Achieving perfectly fried food is simple! Begin by thoroughly preparing your food – patting it dry is crucial for preventing splattering. Carefully load the cooking basket, ensuring not to overcrowd it; this lowers oil temperature and results in soggy food.
Set the desired temperature and timer according to your recipe. Monitor the frying process closely, using the viewing window if available. Gently shake the basket occasionally for even cooking. Once the timer signals completion, carefully remove the basket and drain excess oil before serving.

Preparing Food for Frying
Proper food preparation is key to frying success! Begin by ensuring all food items are completely thawed if frozen. Pat foods dry with paper towels – excess moisture causes dangerous splattering and lowers oil temperature. Marinades should be patted off as well.
For breaded items, ensure the coating adheres well to prevent it from falling off during frying. Consider scoring larger items, like chicken breasts, to promote even cooking. Season generously before frying for maximum flavor. Properly prepared food yields crispy, golden-brown results every time!
Loading the Cooking Basket
Avoid overcrowding the cooking basket! This is crucial for maintaining oil temperature and ensuring even cooking. Work in batches, loading the basket no more than halfway full. Overloading drastically reduces heat, resulting in soggy food.
Ensure food pieces aren’t touching to allow for proper oil circulation. Gently lower the basket into the hot oil, away from yourself, to prevent splashes. Secure the basket handle firmly onto the fryer before releasing. Remember, smaller batches equal consistently crispy and perfectly fried results!
Setting the Temperature & Timer
Precise temperature control is key! Refer to your recipe or the specific food frying guide within this manual for the recommended oil temperature. Use the control knob to accurately set the desired heat. The digital display will show the set temperature and the current oil temperature.
Next, set the timer according to the recipe’s instructions. The timer will automatically shut off the fryer when the set time elapses. Always monitor the frying process visually, even with the timer engaged, to ensure optimal results and prevent overcooking.
Monitoring the Frying Process
Consistent observation is crucial for perfect results! Throughout the frying process, regularly check the food’s color and texture. Use a long-handled utensil to gently turn or separate food items within the basket, ensuring even cooking. Pay attention to the oil temperature displayed on the unit; adjust as needed to maintain the set point.
Be mindful of excessive bubbling or splattering, which may indicate the oil is too hot or there’s excessive moisture on the food. Never leave the fryer unattended during operation. Safety first – always!
Specific Food Frying Guides
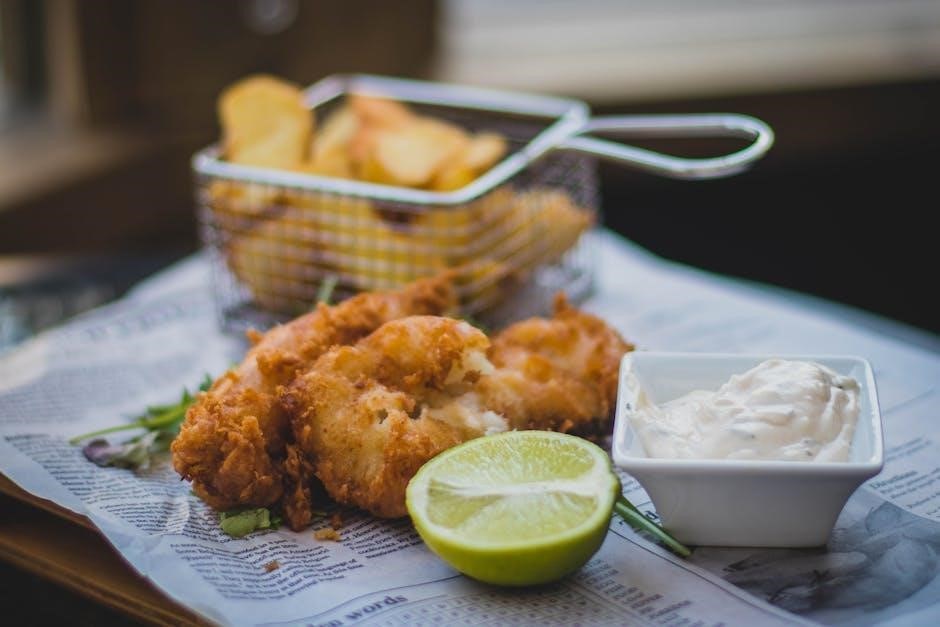
Unlock culinary possibilities with tailored frying instructions! This section provides detailed guidance for achieving optimal results with various foods. Discover precise temperature settings and frying times for a perfectly golden-brown turkey, crispy chicken, and delightful seafood.
We’ll also guide you towards French fry perfection, ensuring each fry is consistently crunchy and flavorful. These guides are designed to take the guesswork out of deep frying, empowering you to create restaurant-quality dishes at home. Enjoy exploring these delicious recipes!
Turkey Frying: A Detailed Walkthrough
Master the art of the perfectly fried turkey! This guide provides a step-by-step process, beginning with proper turkey thawing and preparation – ensuring safety is paramount. We’ll detail calculating the correct oil volume, carefully lowering the turkey into the hot oil, and maintaining a consistent frying temperature.
Learn crucial timing for different turkey sizes, and how to safely remove and rest the cooked bird. We emphasize safety precautions throughout, covering proper equipment use and handling hot oil; Enjoy a juicy, flavorful turkey every time!
Chicken & Poultry Frying
Achieve golden-brown, crispy perfection with poultry! This section details frying chicken, wings, and other poultry items using your Butterball XL. We’ll cover brining or marinating for enhanced flavor and tenderness, alongside proper breading techniques for optimal crispness.
Learn about adjusting frying times based on piece size and quantity. Maintaining the correct oil temperature is key – we’ll guide you through monitoring and adjusting for consistent results. Safety tips for handling hot oil and poultry are included, ensuring a delicious and safe experience.
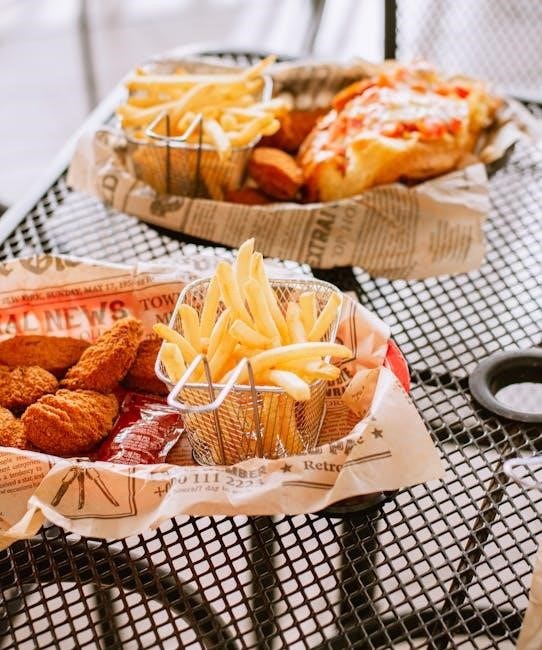
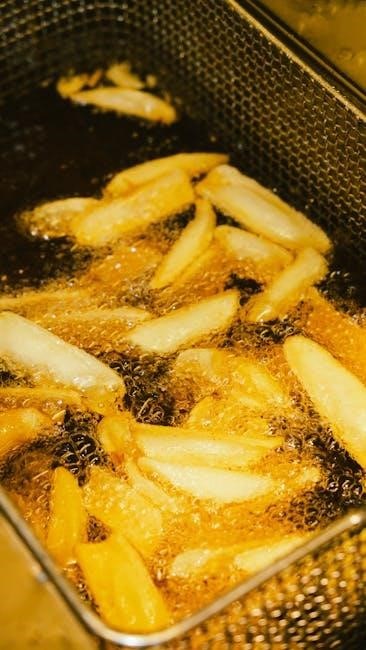
French Fry Perfection
Unlock the secrets to restaurant-quality French fries! This guide focuses on achieving crispy exteriors and fluffy interiors using your Butterball XL fryer. We’ll discuss potato selection – Russets are ideal – and proper cutting techniques for uniform cooking.
Double frying is key: a lower temperature first to cook through, followed by a higher temperature for crisping. Learn about soaking cut potatoes to remove excess starch, preventing sticking and promoting crispness. Precise temperature control and timing are crucial; we’ll provide detailed instructions for perfect fries every time.
Seafood Frying Techniques
Elevate your seafood feasts with perfectly fried delights! This section details techniques for frying fish, shrimp, and other seafood using your Butterball XL fryer. Proper breading is essential – ensure a consistent coating for even cooking and maximum crispness. We’ll cover different breading options, from simple flour-based coatings to seasoned mixtures.
Maintaining oil temperature is vital to prevent soggy seafood. Learn about optimal frying temperatures for various types of seafood and how to avoid overcooking. Careful basket loading prevents overcrowding, ensuring each piece cooks evenly. Enjoy light, flaky, and golden-brown seafood every time!
Cleaning & Maintenance
Preserve your Butterball XL fryer’s performance and longevity with proper cleaning! This section provides a step-by-step guide to disassembling the fryer for thorough cleaning. Always ensure the unit is completely cool and unplugged before beginning. We’ll detail how to safely remove and clean the cooking pot, basket, and heating element.
Pay close attention to cleaning the fryer housing, removing any oil residue or food particles. Proper storage is also crucial; learn how to protect your fryer from damage during periods of non-use. Regular maintenance ensures safe and efficient operation for years to come!
Disassembling the Fryer for Cleaning
Before cleaning, complete disassembly is key! First, ensure the Butterball XL fryer is unplugged and completely cooled. Carefully remove the cooking pot, noting its locking mechanism. Detach the frying basket, and inspect for any remaining food debris. Gently lift out the heating element assembly – never force it.
Some models may have removable control panels; consult your specific model’s diagrams. Keep all screws and small parts organized to simplify reassembly. Proper disassembly allows for a thorough cleaning of each component, ensuring optimal hygiene and performance.
Cleaning the Cooking Pot & Basket
Thorough cleaning prevents flavor transfer and ensures food safety! After disassembly, wash the cooking pot and basket with warm, soapy water. Avoid abrasive cleaners, which can damage the non-stick coating. For stubborn residue, a paste of baking soda and water works wonders. Rinse completely and allow to air dry.
The basket is often dishwasher safe – check your manual for confirmation. Inspect the pot for any warping or damage. A clean pot and basket are crucial for consistently delicious fried foods. Remember to dry completely before reassembling!
Cleaning the Fryer Housing & Components
Maintaining the exterior is key to longevity! Always unplug the fryer and allow it to cool completely before cleaning the housing. Wipe down the exterior with a damp cloth and mild detergent. Avoid immersing the base in water – this could cause electrical hazards.
The control panel can be cleaned with a soft, dry cloth. Inspect the power cord for damage. Ensure all components are thoroughly dry before reassembling. Regular cleaning prevents grease buildup and ensures safe operation. A clean fryer is a happy fryer!
Proper Storage of the Fryer
Secure storage extends your fryer’s life! After thorough cleaning and drying, store the Butterball XL fryer in a cool, dry location. Protect it from extreme temperatures and moisture. Ensure the power cord is neatly coiled and stored to prevent damage.
Consider storing the cooking pot and basket inside the fryer base to keep components together. Original packaging is ideal if available. Keep the manual handy for future reference. Proper storage safeguards your investment and ensures it’s ready for your next frying adventure!
Troubleshooting Common Issues
Facing a frying hiccup? This section addresses typical Butterball XL fryer problems. If the fryer isn’t heating, check the power cord and outlet. Temperature fluctuations may indicate incorrect settings or excessive food load.
Oil splattering often results from adding wet food or overfilling the basket. Timer malfunctions require resetting the unit. Never attempt self-repair; contact customer support for complex issues. Prioritize safety – unplug the fryer before any inspection. Refer to the manual for detailed guidance and preventative measures.
Fryer Not Heating Up
Is your Butterball XL refusing to heat? First, ensure the power cord is securely plugged into a functioning outlet. Test the outlet with another appliance to confirm power delivery. Verify the temperature control is set above the minimum frying temperature.
Check the reset button, typically located near the power cord, and press it if tripped. If the issue persists, the heating element may be faulty – do not attempt to repair it yourself. Contact Butterball customer support for assistance and potential replacement options. Safety first!
Temperature Fluctuations
Experiencing inconsistent frying temperatures? Several factors can cause this. Ensure the food being fried isn’t overloading the basket, as this drastically lowers oil temperature. Avoid placing the fryer in a drafty area, which can affect heat retention.
Verify the power supply is stable; voltage drops can cause fluctuations. If using an extension cord, ensure it’s heavy-duty and rated for the fryer’s wattage. If the problem continues, the thermostat might need calibration or replacement – contact Butterball support for guidance.
Oil Splattering & Overflowing
Concerned about messy splattering or potential overflows? Always ensure food is thoroughly dried before lowering it into the hot oil; excess moisture is a primary cause. Don’t overcrowd the basket – fry in batches to maintain oil levels.
Slowly and carefully lower the basket into the oil to minimize splashing. Never exceed the maximum fill line indicated on the cooking pot. If oil does splatter, immediately turn off the fryer and allow it to cool completely before addressing the issue. Prioritize safety!
Timer Malfunctions
Experiencing issues with the timer? First, verify the fryer is properly plugged into a functioning outlet. If the timer isn’t responding, or is inaccurate, avoid relying on it for precise cooking times.
Manually monitor the frying process using a separate timer or by visually assessing the food’s color and texture. Do not attempt to disassemble or repair the timer yourself; this could void the warranty and pose a safety risk. Contact Butterball customer support for assistance or potential replacement options.
Warranty Information & Customer Support
Your Butterball XL Fryer is covered by a limited warranty against defects in materials and workmanship. Please retain your proof of purchase for warranty claims. The warranty period typically begins from the original date of purchase.
For warranty service or customer support, contact Butterball directly through their official website or dedicated customer service hotline. They offer assistance with troubleshooting, replacement parts, and warranty claim processing. Detailed warranty terms and conditions are available in the included documentation or online.
Frequently Asked Questions (FAQ)
Q: How much oil does the XL fryer hold? A: Capacity varies, but generally around 5-6 quarts. Refer to the ‘Oil Selection’ section for precise calculations based on food volume.
Q: Can I use any type of oil? A: Peanut, canola, and vegetable oils are recommended. Avoid olive oil due to its low smoke point.
Q: What if the fryer won’t heat up? A: Check the power cord and ensure it’s securely plugged in. See ‘Troubleshooting’ for further assistance.
Q: Is the basket dishwasher safe? A: Yes, the basket and pot are typically dishwasher safe, but hand washing is recommended for longevity.