

Yamaha MG10XU User Manual: A Comprehensive Guide
This guide provides detailed instructions for the Yamaha MG10XU mixer, covering setup, operation, advanced features, and troubleshooting․ It references available resources like PDF manuals and service information․
Explore quick start guides, SPX effect algorithms, and safety precautions for optimal performance․ Discover how to download schematics and repair information for expert users․
The Yamaha MG10XU is a versatile 10-input mixer designed for a wide range of audio applications, from live sound reinforcement and recording to podcasting and streaming․ This mixer combines Yamaha’s renowned sound quality with a comprehensive set of features, making it a powerful tool for both beginners and experienced audio professionals․
At its core, the MG10XU offers ten input channels, accommodating microphones, instruments, and line-level sources․ It boasts built-in SPX digital effects, providing reverb, delay, and other creative processing options directly within the mixer․ The integrated USB audio interface allows for seamless recording and playback with a computer, expanding its functionality for music production and content creation․
This user manual serves as a comprehensive guide to unlocking the full potential of your MG10XU․ We will explore each feature in detail, providing step-by-step instructions and practical tips to help you achieve professional-quality sound․ Whether you’re setting up for a live performance, recording a podcast, or simply experimenting with audio, this manual will be your trusted companion․
Resources like PDF manuals from PDF-MANUALS․com and service manuals available online will further enhance your understanding and troubleshooting capabilities․
Key Features and Specifications
The Yamaha MG10XU distinguishes itself with several key features․ It offers 10 input channels, comprising microphone, line, and stereo inputs, providing flexibility for diverse audio sources․ Built-in SPX (Studio Processing) digital effects, derived from Yamaha’s professional SPX series, deliver high-quality reverb, delay, chorus, and more․
A significant feature is the integrated USB audio interface, enabling direct recording and playback to and from a computer without requiring external audio interfaces․ Phantom power (+48V) is available for condenser microphones, expanding microphone choices․ The mixer boasts a compact and durable design, suitable for both studio and live applications․
Specifications include: Total Harmonic Distortion (THD) of 0․005%, Input Sensitivity of -60 dBu, Frequency Response of 20Hz-20kHz, and a Signal-to-Noise Ratio of 90dB․ It supports up to 24-bit/48kHz audio resolution via USB․ Dimensions are approximately 333 x 228 x 117 mm, and it weighs around 2․4 kg․ Referencing online resources like manualszz provides further detailed specifications․
These features combine to make the MG10XU a powerful and versatile mixing solution․

Setting Up Your MG10XU
Begin by carefully unboxing and inspecting your mixer․ Ensure proper power connection and grounding for safe operation․ Familiarize yourself with input and output connections before proceeding;
Unboxing and Initial Inspection
Carefully remove the Yamaha MG10XU mixer from its packaging, taking note of all included accessories․ Inspect the unit thoroughly for any visible signs of shipping damage, such as dents, scratches, or broken components․ Verify that all listed items are present, including the power cord, any bundled cables, and this user manual․
Retain the original packaging materials for potential future transport or warranty claims․ Check all connectors and controls for secure attachment and smooth operation․ Confirm the mixer’s physical condition aligns with expectations before proceeding to the next setup stage․ Document any discrepancies or damage immediately and contact your retailer or Yamaha support․ A meticulous initial inspection ensures a trouble-free experience and protects your investment․ Proper handling during unboxing minimizes the risk of accidental damage․ Remember to keep small parts away from children․
Connecting Power and Grounding
Before connecting the MG10XU to a power source, ensure your AC voltage matches the specified requirement on the unit’s rear panel․ Use only the provided power cord, and avoid adapters or extensions․ Connect the power cord securely to the mixer and a grounded AC outlet․ Proper grounding is crucial for safety and noise reduction․
Avoid using outlets with damaged wiring or loose connections․ If a grounded outlet isn’t available, consult a qualified electrician․ Never operate the mixer with a damaged power cord; Ensure the power switch is in the ‘OFF’ position before connecting or disconnecting the power cord․ Incorrect voltage or improper grounding can cause damage to the mixer and pose a safety hazard․ Always prioritize electrical safety when setting up your equipment․ Regularly inspect the power cord for wear and tear․
Input and Output Connections Overview
The MG10XU features a comprehensive array of input and output connections․ Inputs include XLR and ¼” jacks for microphones and line-level signals on channels 1-8, plus two additional stereo inputs․ These accept balanced or unbalanced connections․ Outputs consist of balanced XLR main outputs, ¼” TRS main outputs, and monitor outputs․
Auxiliary sends and returns allow for external effects processing or monitoring․ A USB port enables audio interface functionality for recording and playback․ Phantom power (+48V) switches provide power for condenser microphones․ Headphone and stereo RCA outputs offer monitoring options․ Carefully identify each connection before plugging in cables to avoid signal routing issues․ Proper cable management ensures a clean and organized setup․ Refer to the rear panel diagram in the manual for precise connector locations․

Understanding the MG10XU Controls
Explore channel input sections, EQ controls (high, mid, low), auxiliary sends, built-in SPX effects, phantom power, and channel faders for precise mixing․
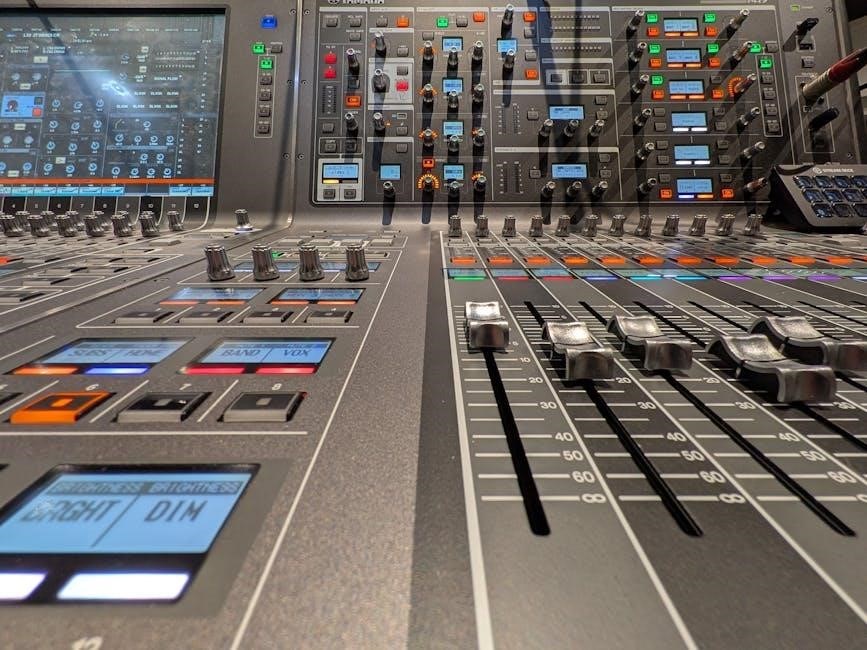
Channel Input Sections (1-10)
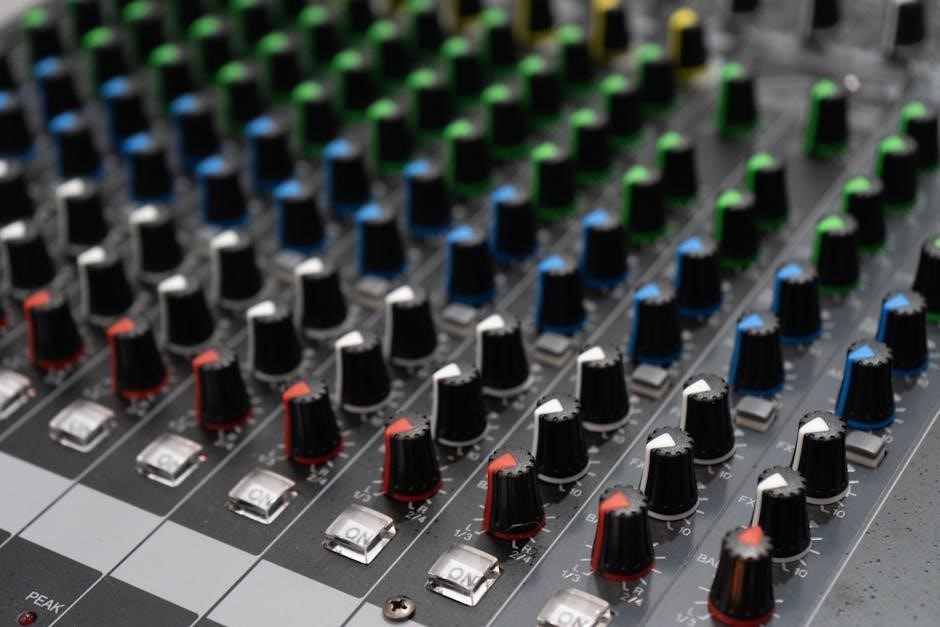
Each of the ten channels on the Yamaha MG10XU features a comprehensive input section designed for versatility and precise control․ These sections begin with an XLR jack and a ¼-inch TRS jack, accommodating both microphone and line-level signals․ A crucial element is the gain control, which adjusts the input signal strength, ensuring optimal levels without distortion․
Following the gain stage is a +48V phantom power switch, essential for condenser microphones․ Next, you’ll find a low-cut filter, effectively reducing unwanted low-frequency noise like rumble․ The channel also includes a peak LED indicator, visually alerting you to signal overload․ Importantly, each channel boasts a dedicated solo switch for focused monitoring during mixing․ These input sections are the foundation for shaping your audio, providing the initial control over each source before further processing․
Understanding these components and their functions is key to maximizing the MG10XU’s potential․ Proper gain staging and utilizing the phantom power and low-cut filter will significantly improve your sound quality․
EQ Controls: High, Mid, Low
The Yamaha MG10XU’s EQ section provides three-band equalization on each channel, allowing for precise tonal shaping․ These controls – High, Mid, and Low – enable you to sculpt the sound of each input, correcting imbalances or enhancing specific frequencies․ The High EQ typically adjusts frequencies above 8kHz, affecting brightness and clarity․ The Mid EQ, often centered around 2․5kHz, controls the body and presence of the sound․
Finally, the Low EQ, usually below 250Hz, manages the bass and fullness․ Each band offers both boost and cut capabilities, allowing for subtractive or additive equalization․ Subtractive EQ – reducing unwanted frequencies – is often preferred for a cleaner mix․ Experimentation is key to understanding how each frequency range affects the overall sound․ Proper EQ can dramatically improve clarity, separation, and the overall impact of your mix․
Remember that small adjustments can make a significant difference, and over-equalization can lead to a muddy or unnatural sound․
Auxiliary Sends and Returns
The Yamaha MG10XU features auxiliary sends and returns, offering versatile routing options for effects and monitoring․ Auxiliary sends allow you to split a portion of a channel’s signal to an external processor, like a reverb or delay unit․ These sends are typically pre-fader, meaning the signal level remains constant regardless of the channel fader position․ This is ideal for creating consistent effects levels․
The auxiliary returns then bring the processed signal back into the mixer, blending it with the original signal․ This setup enables you to add depth and dimension to your mix without affecting the main channel signal․ Aux sends can also be used for creating separate monitor mixes for performers․ Understanding the pre/post-fader switch on each send is crucial for achieving the desired routing․ Experiment with different send levels to find the perfect balance between dry and effected signals․
Built-in Effects (SPX)
The Yamaha MG10XU boasts 24 built-in digital effects derived from Yamaha’s renowned SPX multi-effect processor․ These effects include reverb, delay, chorus, flanger, phaser, tremolo, and more, providing a wide palette of sonic textures․ Accessing these effects is straightforward via dedicated control knobs and a parameter selection button for each effect type․
The SPX effects can be applied to any channel or to the stereo bus, offering flexibility in your mixing applications․ Adjust parameters like decay time, feedback, and depth to tailor the effects to your specific needs․ The quality of these effects is exceptional, delivering professional-sounding results․ Experimentation is encouraged to discover the creative possibilities․ Remember to use effects subtly to enhance your mix, rather than overpowering it․ These algorithms are used by professionals for their quality and versatility․
Phantom Power (+48V)
The Yamaha MG10XU provides +48V phantom power, essential for powering condenser microphones․ This feature is activated individually for each XLR input via a dedicated switch located on the channel strip․ Ensure your microphone requires phantom power before engaging it, as supplying phantom power to dynamic or ribbon microphones can cause damage․
When activated, phantom power delivers a DC voltage through the XLR cable, powering the internal electronics of the condenser microphone․ This results in a stronger, more detailed signal compared to dynamic microphones․ Always connect the microphone before engaging phantom power to prevent potential pops or damage․ Be mindful of the power requirements of your specific microphone model․ Proper use of phantom power unlocks the full potential of condenser microphones, delivering professional-quality recordings and live sound reinforcement․
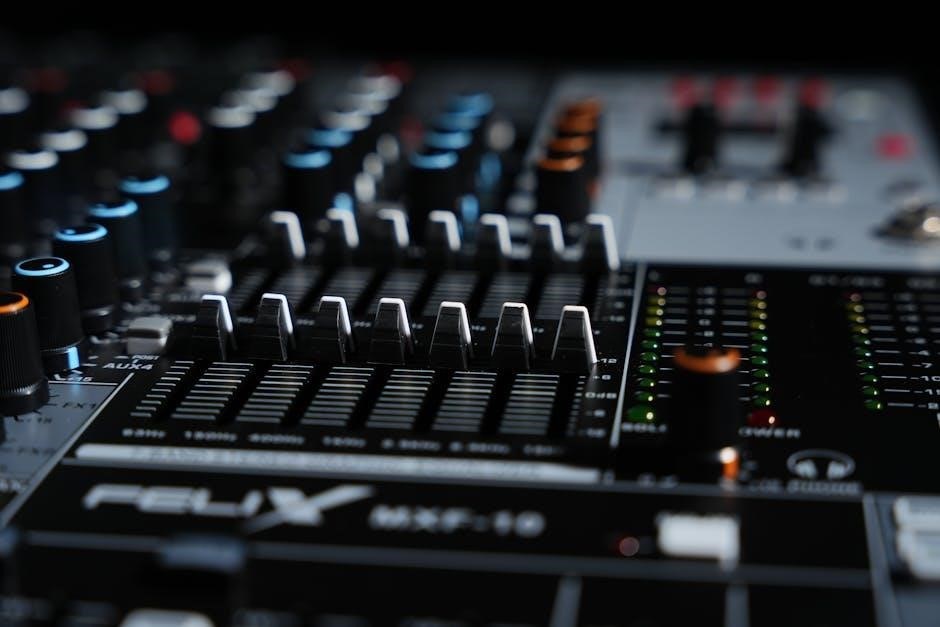
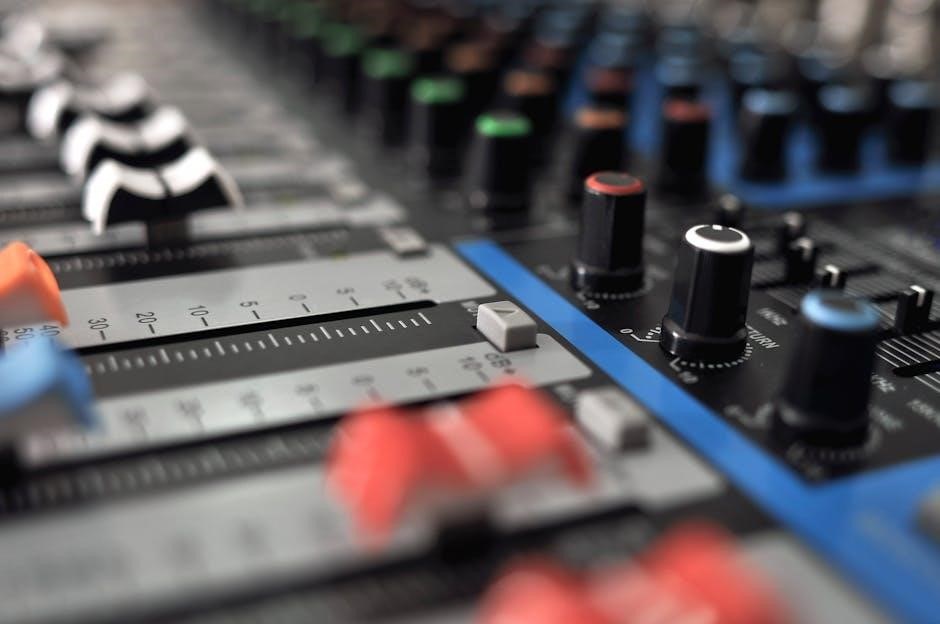
Channel Faders and Pan Controls
Each channel on the Yamaha MG10XU features a 60mm fader, controlling the signal level sent to the main mix․ These faders allow precise adjustment of individual instrument or vocal volumes, crucial for achieving a balanced and polished sound․ Smooth and responsive, they offer tactile control over your mix․
Adjacent to the fader is the pan control, enabling you to position the signal within the stereo field․ Turning the pan control left directs the signal towards the left speaker, while turning it right sends it to the right speaker․ Centering the control provides an equal distribution to both channels․ Effective panning creates a wider, more immersive soundstage, enhancing the overall listening experience․ Experiment with panning to separate instruments and vocals, improving clarity and definition within your mix․
Using the MG10XU for Mixing
Mastering the MG10XU involves setting optimal input levels, balancing the mix effectively, utilizing the built-in effects, and choosing appropriate monitoring options․
Setting Input Levels
Proper input level adjustment is crucial for achieving a clean and professional sound with your Yamaha MG10XU․ Begin by ensuring the channel fader is set to its minimum position․ Gradually increase the gain control on each channel while monitoring the input level meter․ Aim for a signal that peaks around -12dB to -6dB, providing sufficient headroom to prevent distortion․
Avoid clipping – indicated by the level meter hitting the red zone – as this introduces unwanted noise and degrades audio quality․ If clipping occurs, reduce the gain on that channel․ Remember that different sources (microphones, instruments) will require varying gain settings․ Speak or play at the loudest expected volume during level setting․
Pay attention to the signal source; dynamic microphones generally require more gain than condenser microphones; Utilize the MG10XU’s phantom power (+48V) when connecting condenser microphones, but only if required․ Consistent level setting across all channels ensures a balanced and cohesive mix․ Regularly check levels throughout your performance or recording session․
Balancing the Mix
Achieving a balanced mix on the Yamaha MG10XU involves carefully adjusting the volume of each channel to create a harmonious and clear soundscape․ Start by focusing on the most important elements – typically vocals or lead instruments – and set their levels as a foundation․ Then, gradually introduce other instruments, adjusting their faders to complement the primary elements․

Consider the frequency range of each instrument․ Use the EQ controls (High, Mid, Low) to carve out space for each sound, preventing muddiness or harshness․ Pan controls allow you to position instruments in the stereo field, creating width and separation․ Experiment with panning to avoid crowding sounds in the center․
Regularly listen to the mix as a whole, making small adjustments to individual channel levels until a cohesive and pleasing balance is achieved․ Utilize headphones and speakers to check the mix in different listening environments․ Remember, a balanced mix isn’t just about volume; it’s about creating a sonic picture․
Utilizing the Effects Processor
The Yamaha MG10XU boasts a built-in effects processor (SPX) offering 24 high-quality digital effects, derived from Yamaha’s professional SPX series․ These effects include reverb, delay, chorus, and more, enhancing the sonic texture of your mix․ To access these, select the desired effect on the MG10XU and adjust the ‘RTN’ (Return) level to control the effect’s intensity․
Experiment with different effects on various channels to find what best suits each instrument or vocal․ Subtle reverb can add depth and space, while delay can create rhythmic interest․ Be mindful of overusing effects, as this can muddy the mix․
The ‘FX to Monitor’ control allows you to send the effect signal to your headphone or monitor mix, enabling you to preview the effect before sending it to the main output․ Proper utilization of the SPX processor can significantly elevate the quality and professionalism of your sound․
Monitoring Options: Headphones and Speakers
The Yamaha MG10XU provides versatile monitoring options for both headphones and speakers, crucial for critical listening during mixing․ Utilize the ‘PHONES’ jack for private monitoring, adjusting the ‘PHONES LEVEL’ control to set the desired volume․ Ensure headphones are connected before powering on to prevent potential damage from sudden loud sounds․
For speaker monitoring, connect your studio monitors to the ‘MAIN OUT’ jacks․ The ‘MAIN LEVEL’ control adjusts the overall output volume sent to the speakers․ Consider using nearfield monitors for accurate sound reproduction in a typical mixing environment․
The ‘MONITOR OUT’ jacks offer an alternative output for connecting additional speakers or stage monitors․ Remember to balance the levels between headphones and speakers to achieve a consistent and accurate representation of your mix․ Careful monitoring is essential for achieving a polished and professional sound․

Advanced Features and Troubleshooting
Explore the MG10XU’s USB audio interface, recording/playback capabilities, and service manual access․ Address common issues with provided troubleshooting steps for optimal performance․
USB Audio Interface Functionality
The Yamaha MG10XU seamlessly integrates as a USB audio interface, enabling direct connection to your computer for recording and playback․ This eliminates the need for external sound cards, streamlining your digital audio workflow․ Simply connect the mixer to your computer via USB, and it will be recognized as an audio device․
This functionality allows you to record individual channels or the stereo mix directly into your preferred Digital Audio Workstation (DAW) software․ Playback from your DAW can also be routed through the MG10XU, allowing you to monitor the audio through headphones or speakers connected to the mixer․ The quality of the audio transmission is maintained through high-performance USB audio converters․
Drivers are generally automatically installed by your operating system, though Yamaha may offer dedicated drivers for enhanced compatibility and performance․ Ensure you have the latest drivers installed for optimal operation․ This feature is ideal for musicians, podcasters, and anyone needing a simple and effective solution for computer-based audio recording and playback․
Recording and Playback
Utilizing the MG10XU’s USB audio interface capability, recording and playback become remarkably straightforward․ Connect the mixer to your computer, launch your Digital Audio Workstation (DAW), and select the MG10XU as your audio input and output device․ You can then record individual channels or the stereo mix, capturing your performance directly into your computer․
For playback, route the audio from your DAW back through the MG10XU, allowing you to monitor it using the mixer’s headphone output or connected speakers․ Adjust the channel faders to control the levels of each track during playback, ensuring a balanced and polished sound․ The built-in effects processor can even be applied to the recorded tracks during playback for added creativity․
Experiment with different recording configurations and monitoring setups to achieve your desired sound․ Remember to adjust input levels carefully to avoid clipping and ensure a clean recording․ The MG10XU provides a convenient and high-quality solution for all your recording and playback needs․
Troubleshooting Common Issues
If you encounter no sound, first verify all connections – power, audio cables, and USB․ Ensure the channel faders are raised, and the correct input source is selected; Check the phantom power switch (+48V) if using condenser microphones․ A lack of signal may also indicate a faulty cable or microphone․
For unwanted noise, confirm proper grounding and minimize interference from nearby electronic devices․ If distortion occurs, reduce input levels on the affected channel․ USB connectivity problems can often be resolved by updating drivers or trying a different USB port․ Consult the service manual for more in-depth troubleshooting steps․
Remember to systematically check each component and setting․ Online forums and Yamaha’s support website offer valuable resources and solutions to common issues․ If problems persist, consider seeking assistance from a qualified technician․
Understanding the Service Manual
The Yamaha MG10XU service manual is a technical resource intended for qualified electronics experts․ It contains detailed schematics, block diagrams, and component layouts crucial for repair and maintenance․ Accessing this manual requires a degree of electronic knowledge and should not be attempted by untrained individuals․
Within the manual, you’ll find information on disassembly, troubleshooting procedures, and parts lists․ EEPPROM data and calibration instructions are also included, enabling precise adjustments․ Understanding the schematics allows technicians to trace signal paths and identify faulty components efficiently․
The service manual complements the user manual by providing in-depth technical details․ It’s a valuable tool for diagnosing complex issues beyond the scope of standard troubleshooting․ Downloadable versions are available online, but ensure the source is reputable to avoid corrupted files․
Safety Precautions and Maintenance
Always follow important safety guidelines during operation․ Regular cleaning and proper care will ensure longevity and optimal performance of your Yamaha MG10XU mixer․
Important Safety Information
To ensure safe operation of your Yamaha MG10XU, heed these crucial precautions․ Always connect the unit to a properly grounded outlet, avoiding damp or wet locations․ Never open the chassis as high voltages are present inside, posing a risk of electric shock․
Avoid placing heavy objects on the mixer, and ensure adequate ventilation to prevent overheating․ Do not use the device near flammable materials or liquids․ Regularly inspect the power cord for damage, and replace it if necessary․ Keep the unit away from direct sunlight and extreme temperatures․
When cleaning, disconnect the power and use a dry cloth; avoid solvents․ Exercise caution during installation and transportation to prevent damage․ Refer to the full owner’s manual for comprehensive safety details and warnings․ Ignoring these precautions could result in injury or damage to the equipment․ Prioritize safety for a long-lasting and enjoyable mixing experience․
Cleaning and Care
Maintaining your Yamaha MG10XU’s pristine condition ensures longevity and optimal performance․ Before any cleaning, always disconnect the unit from the power source to prevent electrical shock․ Use a soft, dry cloth to gently wipe down the exterior surfaces, removing dust and debris․
Avoid using liquid cleaners, solvents, or abrasive materials, as these can damage the finish or internal components․ For stubborn dirt, lightly dampen the cloth with water, ensuring it’s not dripping wet, and wipe carefully․ Pay attention to the faders, knobs, and connectors, cleaning around them to maintain smooth operation․
Regularly check the connectors for dust accumulation and clean them with compressed air if needed․ Store the MG10XU in a clean, dry environment when not in use, protecting it from extreme temperatures and humidity․ Proper care will keep your mixer looking and sounding its best for years to come․
Warranty Information
Yamaha provides a limited warranty for the MG10XU mixer, protecting against defects in materials and workmanship․ The warranty period typically begins from the date of original purchase, as indicated on the sales receipt․ It’s crucial to retain proof of purchase for any warranty claims․
The standard warranty coverage usually lasts for one year, but may vary depending on the region and retailer․ This warranty covers repairs or replacement of defective parts, at Yamaha’s discretion․ However, it does not cover damage caused by misuse, accidents, unauthorized modifications, or normal wear and tear․
To initiate a warranty claim, contact your local Yamaha dealer or authorized service center․ They will guide you through the process and arrange for inspection and repair․ Review the full warranty details included with your product or available on the Yamaha website for complete terms and conditions․